Tips
No output when printing from Chromebook to a printer (Tips No.02119)
The print data may not have been sent correctly.
Please try changing either of the settings below and see if you can print.
◎ Please check before changing settings
- ● [Check] Is the power to the multifunction device turned on?
- ● [Check] Are the multifunction device and Chromebook connected to the network?
- ● If there are no problems with the above two points, please try changing either of the settings below.
The images and operations on this page are explained using the multifunction device BP-70C65 and Chrome OS version 125 as an example.
Change settings on the multifunction device
1. Enter the IP address of the multifunction device in the browser's address bar to display the web management screen.
- Example
- IP Address: 192.168.11.100

Reference Information
When the login screen appears.
Ask the administrator of the MFP If you do not know the password.
Check StartGuide for the default password.
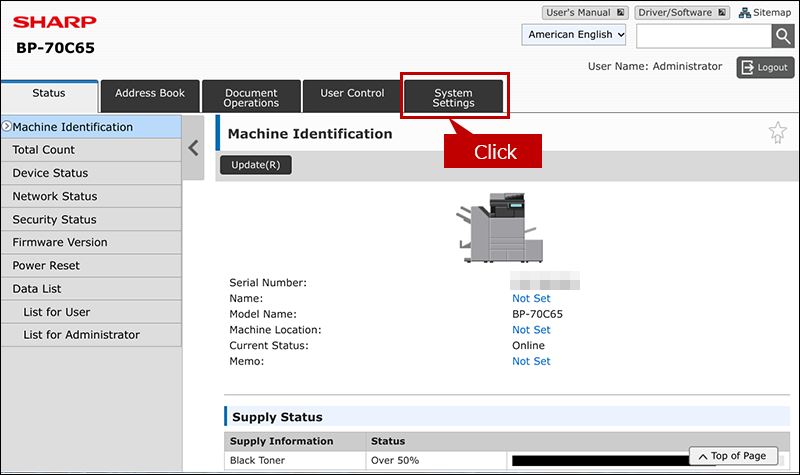
2. The multifunction device information screen will be displayed. Click the [System Settings] tab.
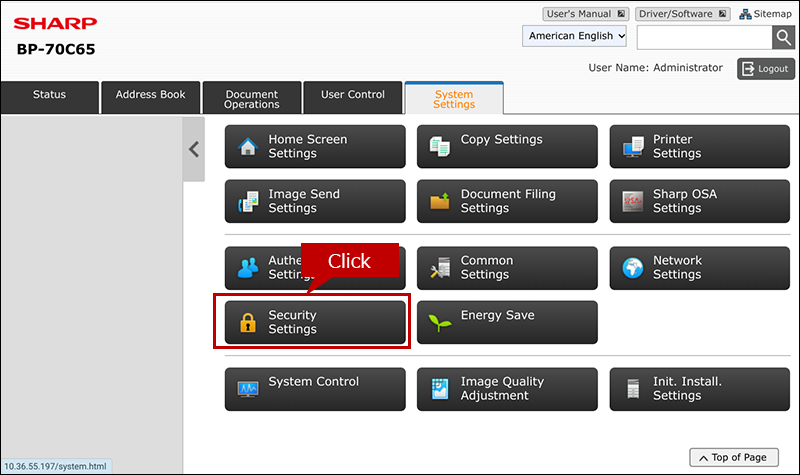
3. The system settings menu will be displayed. Click the [Security Settings] button.
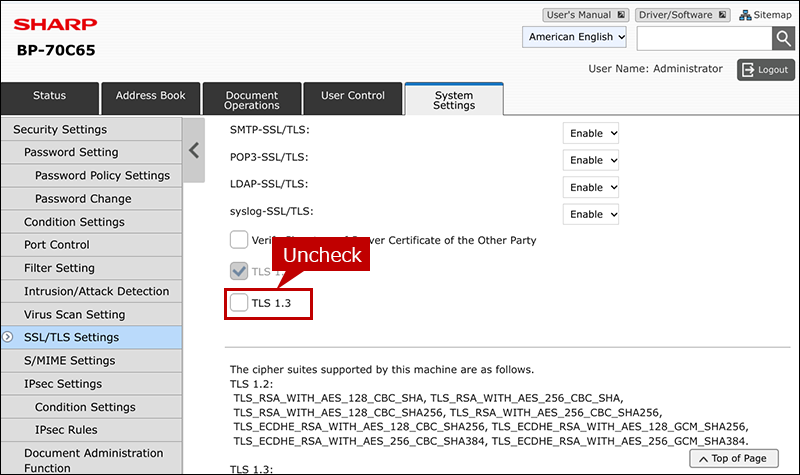
4. The "Security Settings" screen will be displayed. Click [SSL/TLS Settings] on the left menu.

5. The "SSL/TLS Settings" screen will be displayed, so uncheck the "TLS 1.3" item.
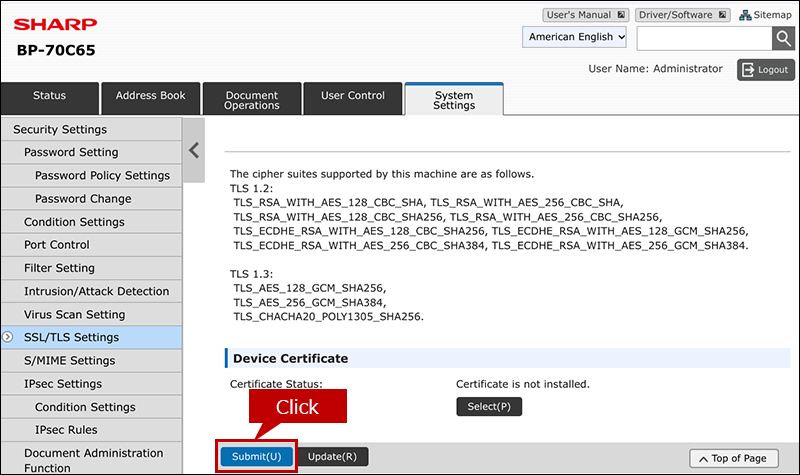
6. Scroll to the bottom of the page and click the [Submit] button.
7. Check if you can print.
Reference Information
Change settings on the Chromebook side
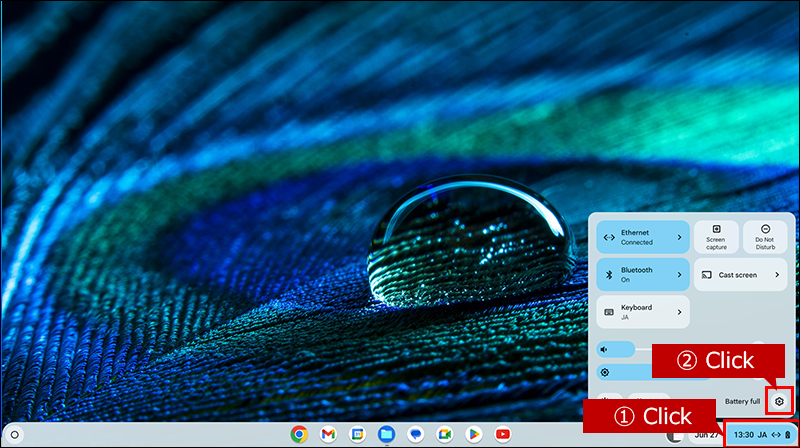
1. Click on the time in the lower right corner and click the "Settings" button (gear symbol) in the menu that appears.
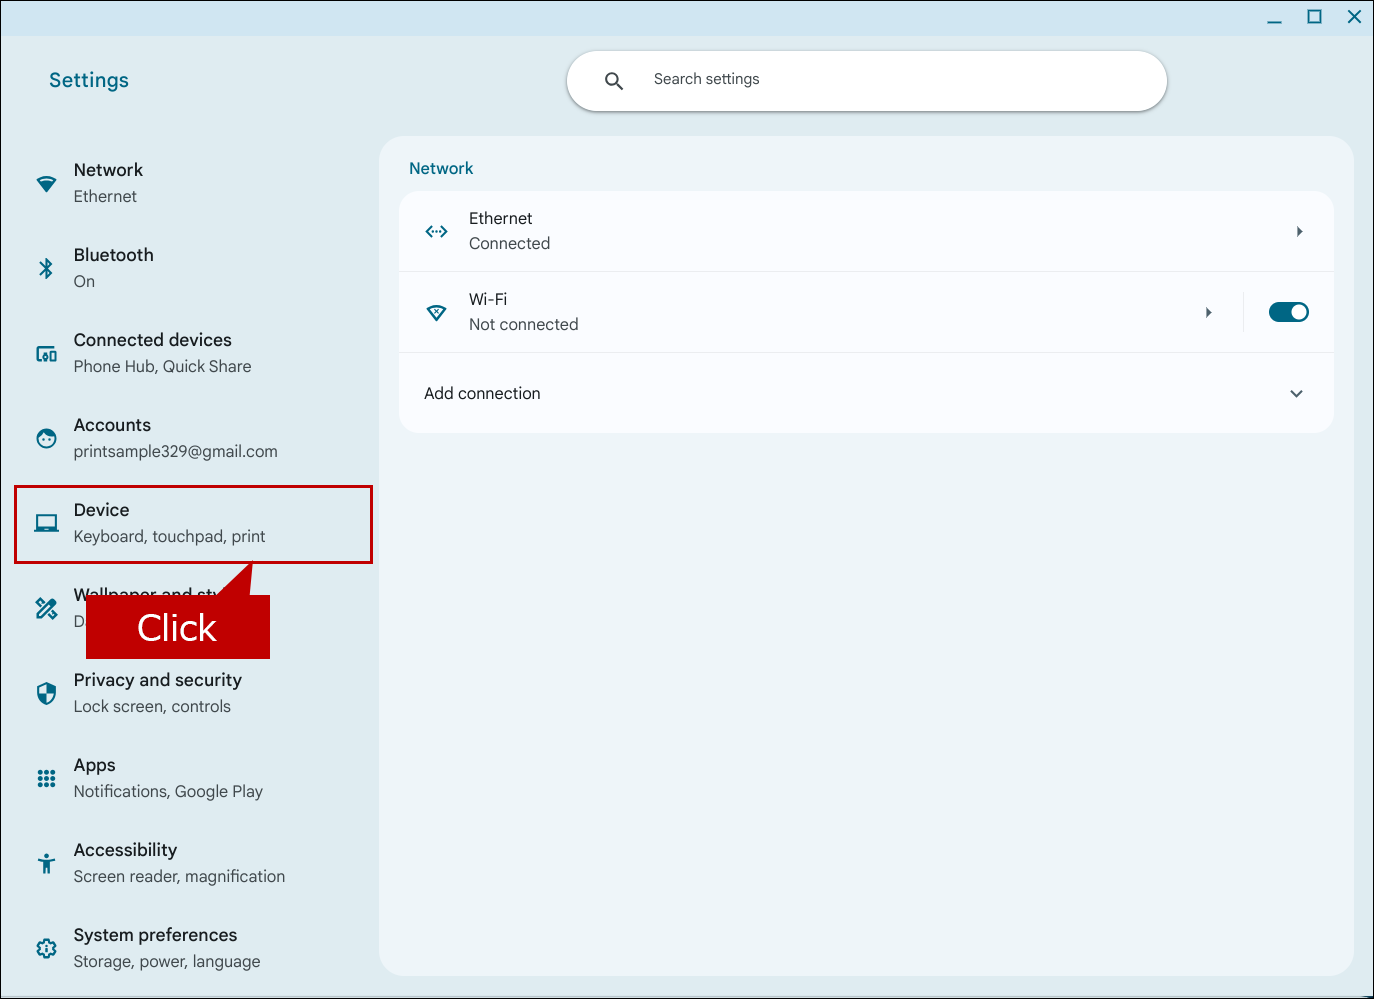
2. The "Settings" screen will be displayed. Click [Device] on the left menu.
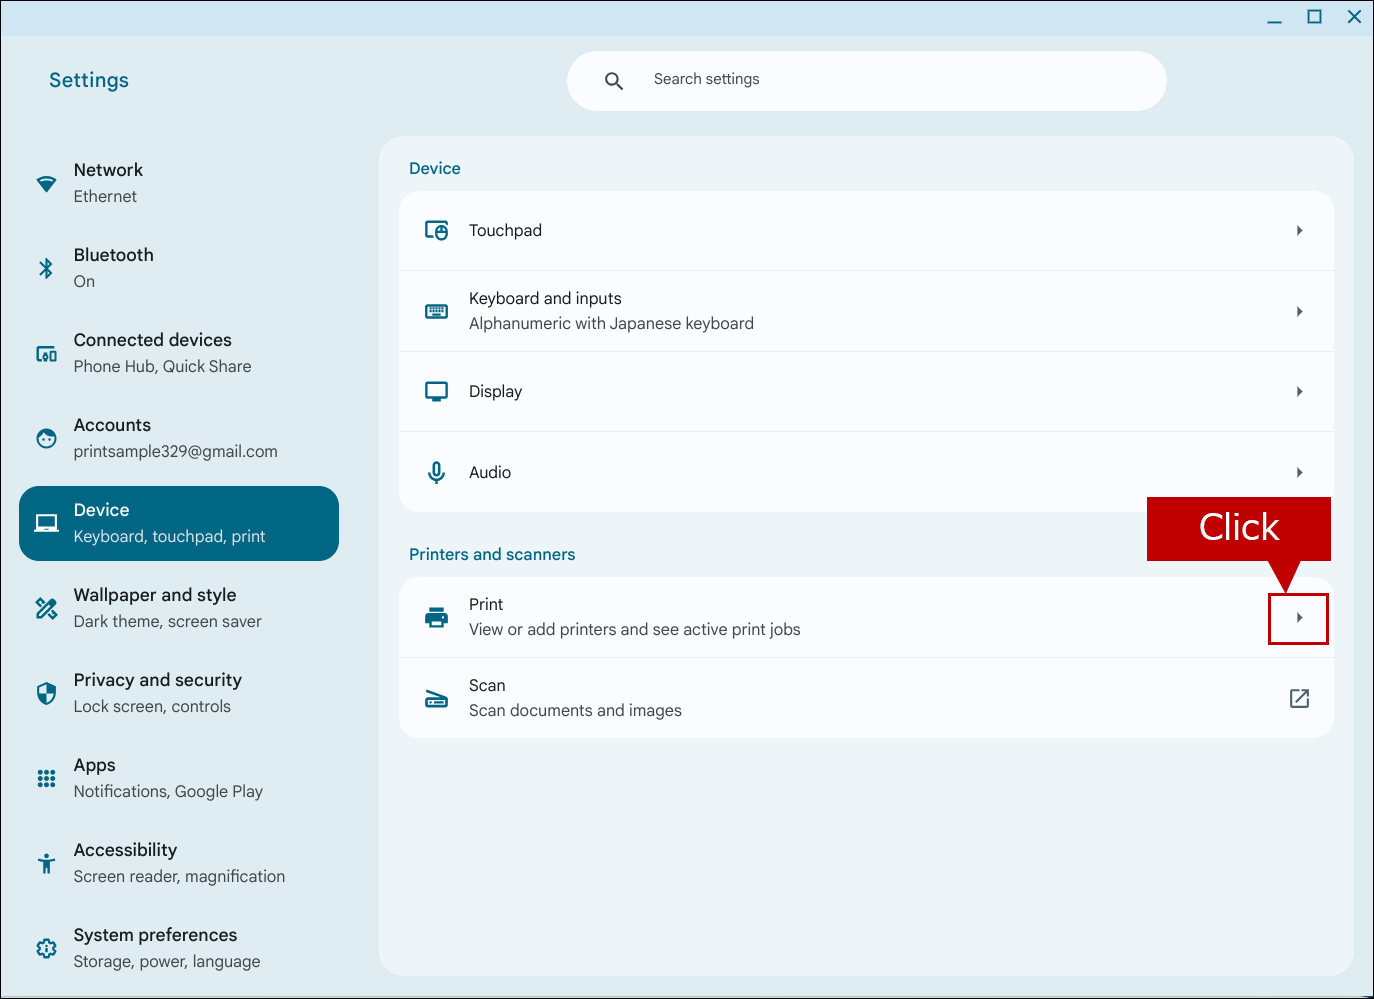
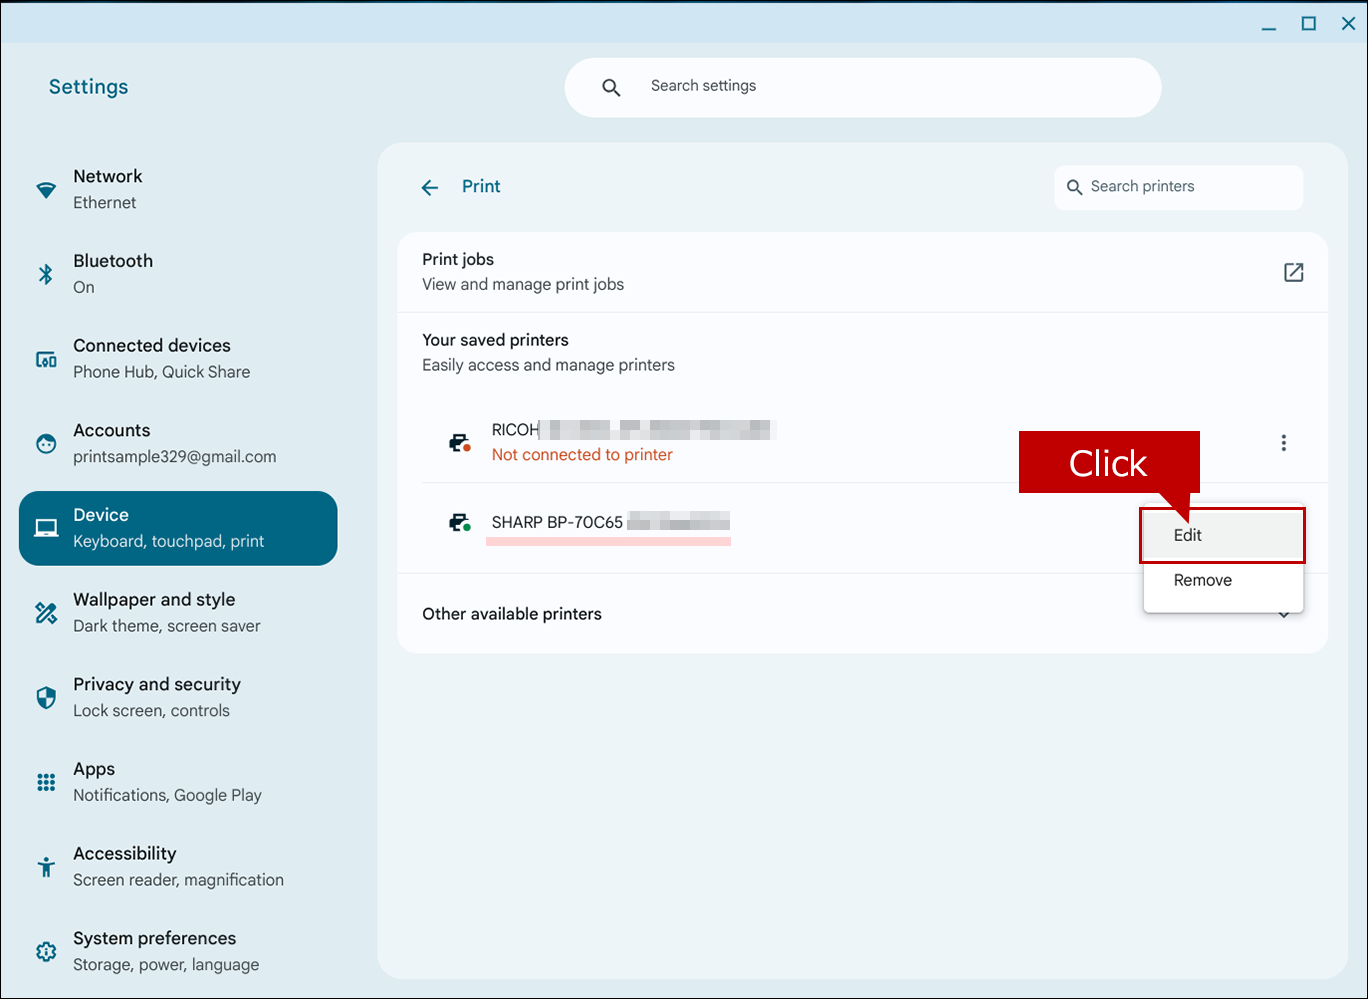
3. The "Device" menu will be displayed, so click [Print].
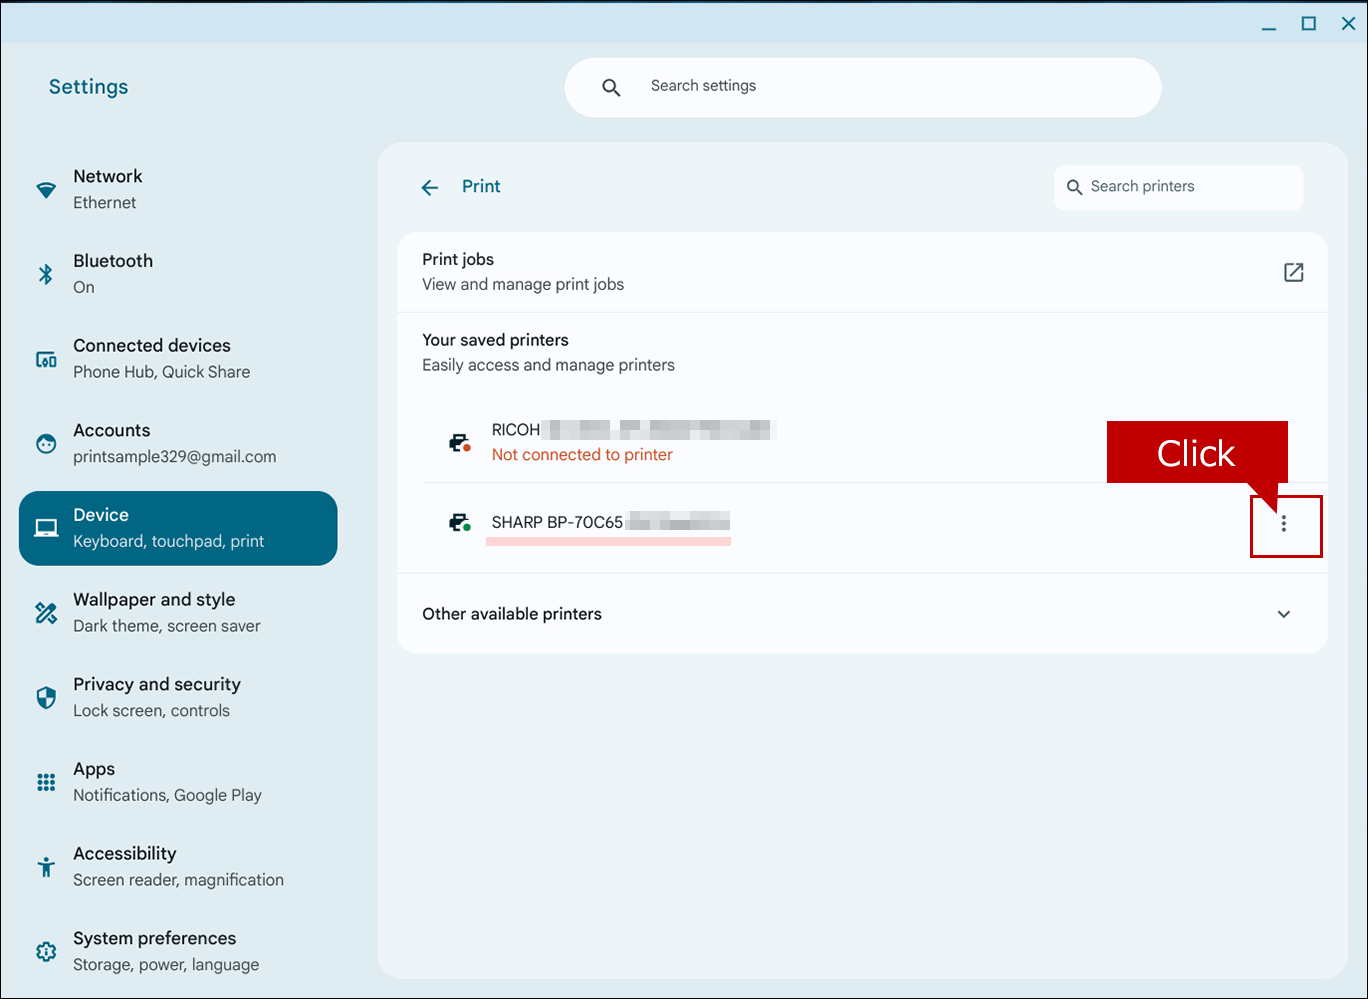
4. A list of "saved printers" will be displayed, so click the [Settings] button (three vertical "・" marks) to the left of the name of your multifunction device.
5. A menu will appear, so click the [Edit] button.
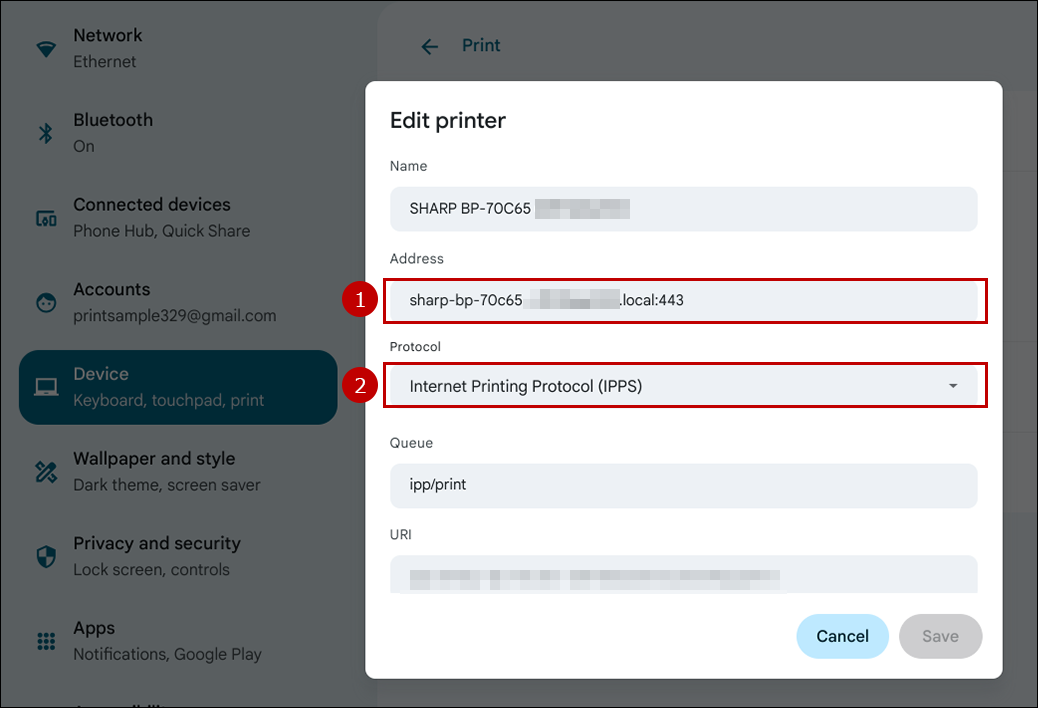
6. The printer settings will be displayed, so change the following items.
| Items to change | Value before change | Value after change |
|---|---|---|
| ① Address | ~:443 (last 3 digits) | ~:631 (last 3 digits) |
| ② Protocol | Internet Printing Protocol (IPPS) | Internet Printing Protocol (IPP) |
7. Next, check the contents and click the [Save] button.
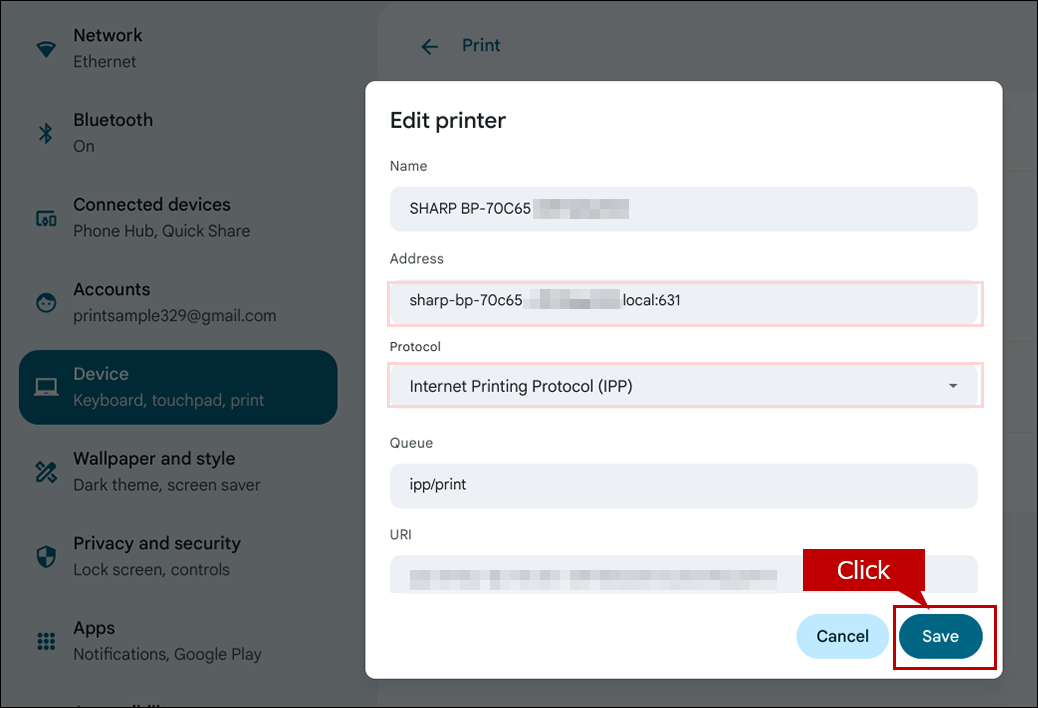
8. Check if you can print.
