Configure the output settings for copies using Sort,
Group, Offset, Separator Page, Staple, Punch, or Fold. Also specify the
output destination of copies.
You can tap the [Output] key in normal mode to configure
settings for all output functions.
Settings for the staple and punch functions can also be configured
from simple mode.
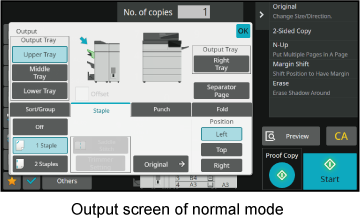
Output
Tray
Specify the destination to output copies.
If a finisher (large stacker) or saddle stitch finisher (large
stacker) is installed, you can select [Upper Tray], [Middle Tray], or
[Lower Tray], or if a saddle finisher is installed, you can select
from [Top Tray], [Finisher Tray], or [Right Tray].
Offset
This function outputs copies while shifting them set by set.
Setting the checkbox to
 enables the offset function, and setting
it to
 disables the function.

Specify the destination
to output copies.
Tap the [Detail] key to change to normal mode.
EASY MODETap the [Output] key.
Select the output tray from "Output Tray".
After the settings are completed, tap the [OK] key.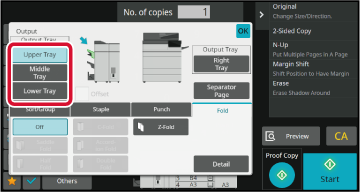
This section explains how
to select the sorting method when outputting the scanned original.
|
Auto |
Enables the sort mode when the original is placed in the automatic document feeder, and enables the group mode when the original is placed on the document glass. |
|
|---|---|---|
|
Sort |
Sorts the scanned original on a set basis, and outputs them. Example: When 5 is set for the number of copies in sorting  |
|
|
Group |
Groups the scanned original on a page basis, and outputs them. Example: When 5 is set for the number of copies in grouping  |
|
Tap the [Detail] key to change to normal mode.
EASY MODETap the [Output] key.
Select the sorting method.
After the settings are completed, tap [OK] key. to have each set of output be offset
from the previous set to enable easy removal from the output tray.
to have each set of output be offset
from the previous set to enable easy removal from the output tray.Specify whether or not the set of output
will be stapled.
Portrait orientation
| Original Orientation | Staple | Staple Position | ||
|---|---|---|---|---|
| Left | Top | Right | ||
|
Portrait orientation |
1 Staples |
 |
 |
 |
|
2 Staples |
 |
 |
 |
|
|
Stapleless Staple |
 |
|||
|
Landscape orientation |
1 Staples |
 |
 |
 |
|
2 Staples |
 |
 |
 |
|
|
Stapleless Staple |
 |
|||
Tap the [Staple / Punch] key.
COPY MODESelect the number of staples and staple position.
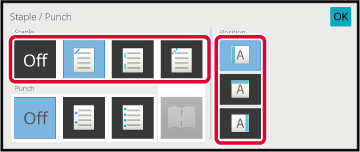

Tap the [Staple / Punch] key.
COPY MODESelect
 .
.
Select binding edge and original settings.
After the settings are completed, tap [OK] key.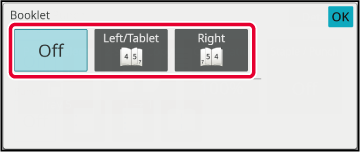
The setting procedure in normal mode is explained.
Tap the [Detail] key to change to normal mode.
EASY MODETap the [Output] key.
Tap the [Staple] tab, and tap the staple position key.
Tap the [Original] key to change the original settings.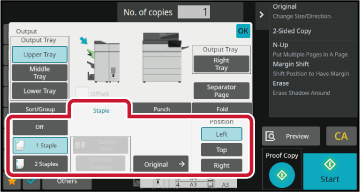
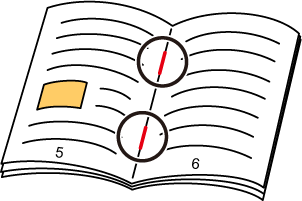
This function staples each set of copies at two positions
in the center of paper, folds them in half, and outputs them. For saddle
folding, it trims a side drop, offering a good-looking output image.
The setting procedure in normal mode is explained.
Tap the [Detail] key to change to normal mode.
EASY MODETap the [Output] key.
Tap the [Staple] tab, and tap the [Saddle Stitch] key.

Tap the [Left Binding/ Tablet] or [Right Binding] key to select an original and configure the cover sheet setting.
After the settings are completed, tap [OK] key.
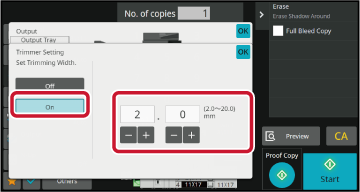
When Saddle Stitch is selected, tap the [Trimmer Setting] key.

Tap the [On] key, and specify the trimming width.
Tap the numeric value display field of the trimming width, and enter the allowable range using the numeric keys. Otherwise, tap . After the settings are completed, tap the
[OK] key.
This function punches copies and outputs
them to the tray.
Example: When the original is in either portrait or landscape
orientation, and the punch position is set to the left

| Original Orientation | Punch Position | ||
|---|---|---|---|
| Left | Top | Right | |
|
OFF |
Does not punch. |
||
|
Portrait orientation |
 |
 |
 |
|
Landscape orientation |
 |
 |
 |
Tap the [Staple / Punch] key.
COPY MODESelect punching and set the position.
After the settings are completed, tap [OK].Tap the [Detail] key to change to normal mode.
EASY MODETap the [Output] key.
Tap the [Punch] tab, select punching and set the position.
To change the output tray, tap the [Output Tray] key, and select the output destination.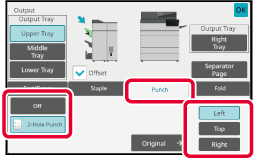
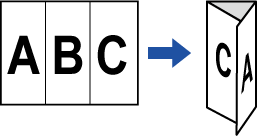
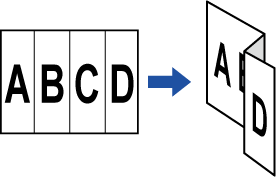
This function is used to fold copies before
delivery to the output tray.
When a paper folding unit is installed, you can fold papers
in Z-fold and C-fold.
When a saddle stitch finisher is installed, you can use saddle
folds.
The paper sizes that can be selected vary depending on the
type of paper fold.
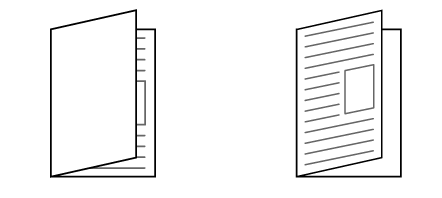
Example: Fold Inside, Fold Outside
| Folding types | Usable paper | Print Side | Fold Orientation | Folding image |
|---|---|---|---|---|
| Saddle Fold | Saddle stitch finisher: 12" × 18", 11" × 17", 8-1/2" × 14", 8-1/2" × 11"R, A3W, A3, B4, A4R, 8-1/2" × 13-1/2", 8-1/2" × 13-2/5", 8-1/2" × 13", 8K, 16KR Saddle stitch finisher (large stacker): 12" × 18", 11" × 17", 8-1/2" × 14", 8-1/2" × 13-1/2", 8-1/2" × 13-2/5", 8-1/2" × 13", 8-1/2" × 11"R, A3W, A3, B4, A4R,, 8K | Inside | - |
 |
| Outside | - |
 |
||
| Half Fold | 8-1/2" × 11"R, A4R | Inside | - |
 |
| Outside | - |
 |
||
| C-Fold | 8-1/2" × 11"R, A4R | Inside | Open Right |
 |
| Open Left |
 |
|||
| Outside | Open Right |
 |
||
| Open Left |
 |
|||
| Accordion Fold | 8-1/2" × 11"R, A4R | - | Open Right |
 |
| - | Open Left |
 |
||
| Double Fold | 8-1/2" × 11"R, A4R | Inside | Open Right |
 |
| Open Left |
 |
|||
| Outside | Open Right |
 |
||
| Open Left |
 |
|||
| Z-Fold | 11" × 17", 8-1/2" × 14", 8-1/2" × 11"R, A3, B4, A4R | - | Open Right |
 |
| - | Open Left |
 |
*1 Cannot be used when a finisher (large capacity) or saddle stitch finisher (large capacity) is installed.
*2 Cannot be used when a finisher or saddle finisher is installed.
Tap the [Detail] key to change to normal mode.
EASY MODETap the [Output] key.
Tap the [Fold] tab, and tap the folding type key.

Tap the [Detail] key.
For the setting method, see " Detail Type for each Folding Type".
Specify "Print Side" and "Multiple Fold".
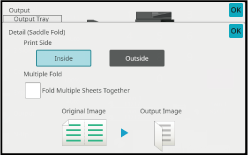
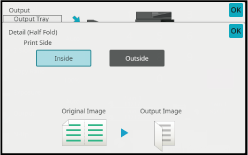
Specify "Print Side".
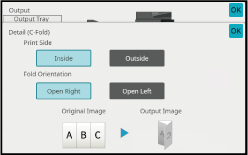
Specify "Print Side" and "Fold Orientation".
Specify "Fold Orientation".

Specify "Print Side" and "Fold Orientation".

Specify the paper size and "Fold Orientation" for Z-folding.

This function inserts separator pages between
each set of copies or between each job.
When you insert separator pages between sets of copies, you
can specify whether to insert the separator page before or after
each set. You can also specify the number of copies that makes one
set.
When you insert separator pages between jobs, you can specify
whether to insert a separator page before or after each job.
In the following examples, four copies of a two-page
original are output.
Inserting
a separator page before each set of two copies


Tap the [Detail] key to change to normal mode.
EASY MODETap the [Output] key.
Tap the [Separator PageSeparator Page] key.

Specify the separator page insertion mode.
 . Next, tap
 to specify the number of copies in each
set.
 .
.
Version 04a / bp70m90_usr_04a_en