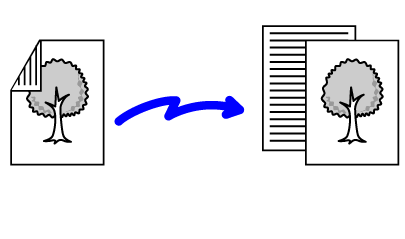
The automatic document feeder
will automatically scan both sides of the document.
For example, a 2-sided original can be scanned, and its front
and back sides can be sent as 2 pages.
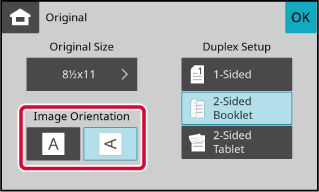
Tap the [Original] key, and tap the [2-Sided Booklet] key or [2-Sided Tablet] key.
See the figure on the left to check the binding edge of the original and select the key to be tapped.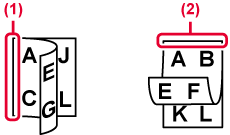
Tap the [Image Orientation] key with the same orientation as the placed original.
If this setting is not correct, a suitable image may not be transmitted. After the settings are completed, tap .
.
Specify the original size manually.
Tap the [Original] key.
Tap the [Size] key.
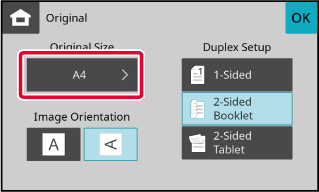
Tap a key of the desired original size.
After the settings are completed, tap.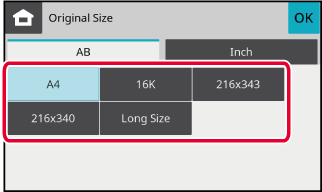
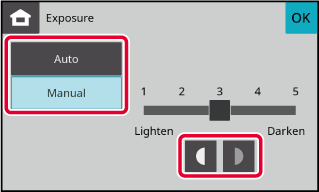
The exposure can be changed to suit the darkness of the original.
Exposure
settings
| Exposure | Suggestion | |
|---|---|---|
|
Auto |
This setting automatically adjusts the exposure for light and dark parts of the original. |
|
|
Manual |
1-2 |
Select this setting when the original consists of dark text. |
|
3 |
Select this setting for a normal original (neither dark nor light). |
|
|
4-5 |
Select this setting when the original consists of light text. |
|
After tapping the [Exposure] key, tap the [Manual] key.
Adjust the exposure with
 .
.
.
The resolution can be specified to match
the characteristics of the original, such as text or photo, the
size of the text, and the darkness of the image.
Resolution
settings
| Resolution | Suggestion |
|---|---|
|
Standard |
Select this setting when your original consists of normal-sized text (like the text in this manual). |
|
Fine |
Select this setting when your original has small text or diagrams with fine lines. The original will be scanned at twice the resolution of the [Standard] setting. |
|
Super Fine |
Select this setting when your original has intricate pictures or diagrams. A higher-quality image will be produced than with the [Fine] setting. |
|
Ultra Fine |
Select this setting when your original has intricate pictures or diagrams. This setting gives the best image quality. However, transmission will take longer than with the other settings. |
|
Half Tone |
Select this setting when your original is a photograph or has gradations of colour (such as a colour original). This setting will produce a clearer image than [Fine], [Super Fine], or [Ultra Fine] used alone. Halftone cannot be selected when [Standard] is used. |
Tap the [Resolution] key.
Tap the key of the desired resolution.
When your original is a photograph or has gradations of colour (such as a colour original), and you wish to produce a clearer image than [Fine], [Super Fine], or [Ultra Fine] used alone, set the [Half Tone] checkbox to ..
..
Version 05a / bpc131wd_usr_05a_en
